IKEA FJÄLLBO TV bench assembly instructions
How to assemble the IKEA FJÄLLBO TV bench, step by step: 35 animated steps built from the official manual, about 2–3 hours for 2 people, with Phillips screwdriver, spirit level.
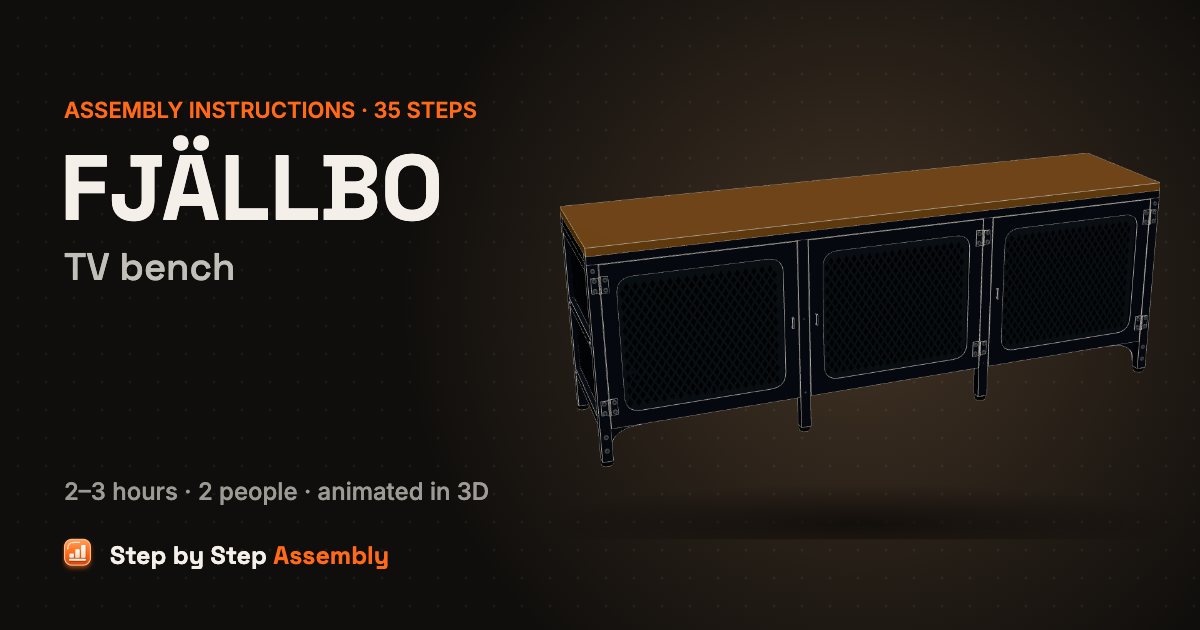
Long black steel TV bench on eight posts with a solid wood top and middle shelf, a perforated steel bottom shelf, perforated end panels and three perforated doors. Size: 150x36x54 cm. About 2–3 hours, 2 people. Tools: Phillips screwdriver, Spirit level.
Based on the official IKEA manual AA-1927215-8 (PDF). Guide updated .
| Steps | 35 |
|---|---|
| Time | 2–3 hours |
| People | 2 |
| Tools | Phillips screwdriver, Spirit level |
| Size | 150x36x54 cm |
| Official manual | AA-1927215-8 |
| IKEA article number | 903.392.90 (black) |
| Pieces in the box | 123 |
In the box
| Part | Part number | Quantity |
|---|---|---|
| End frame (2 posts + perforated panels) | 2 | |
| Middle rail | 2 | |
| Perforated bottom shelf | 1 | |
| Curved brace | 2 | |
| Middle post | 4 | |
| Middle shelf (smaller board) | 1 | |
| Top board (larger board) | 1 | |
| Top frame | 1 | |
| Wall spacer bracket | 2 | |
| Perforated door | 3 | |
| Adjustable foot | 122158 | 8 |
| Screw | 107616 | 42 |
| Screw | 139212 | 8 |
| Screw | 152497 | 16 |
| Sleeve nut | 152526 | 4 |
| Screw | 152527 | 4 |
| Hinge | 153334 | 6 |
| Magnet | 139578 | 3 |
| Screw | 114755 | 3 |
| Cable clip | 123742 | 10 |
Steps
- Right end frame and back rail — The bench is built lying on its back. Stand the right end frame on a rug, back post down, leg ends towards you. Slide a middle rail along the floor into the lower cradle at the middle cross bar, tabs pointing up. Check: Work on a rug or the flattened box so the black finish does not get scratched. Check the end frame's direction: the leg ends point towards you.
- Screw the back rail — Fix the end of the rail with 1 screw (107616) from the outside of the end frame. Turn it in clockwise with a Phillips screwdriver.
- Bottom shelf — Stand the perforated bottom shelf on its long edge and slide it towards the end frame, so its back tube goes into the lower cradle at the bottom cross bar.
- Screw the bottom shelf — Fix the back tube of the bottom shelf with 1 screw (107616) from the outside of the end frame.
- Front middle rail — Take the second middle rail and slide it into the upper cradle at the middle cross bar, on top, with its tabs pointing down into the frame.
- Screw the front rail — Hold the free end of the rail up and fix it with 1 screw (107616) from the outside of the end frame.
- Left end frame — With a second person, hold the left end frame the same way round and push it onto the free ends of the two rails and the bottom shelf, so they go into its cradles. Check: Two people needed: all three joints must go in together.
- 3 screws in the left frame — Fix the left end frame with 3 screws (107616) from the outside: into the back rail, the bottom shelf and the front rail.
- Curved braces — Slide a curved brace in from the leg end at each front corner, its plate behind the front post and the flange under the bottom shelf. Fix each one with 2 screws (107616) up into the shelf tube.
- Braces to the front posts — Join each brace to its front post: push 2 sleeve nuts (152526) in from the front of the post and screw 2 screws (152527) in from the brace side, into the sleeve nuts. Check: The sleeve nuts go in from the post side and the screws from the brace side, not the other way round.
- Feet in the corner posts — Screw an adjustable foot (122158) into the end of each of the 4 corner posts by hand.
- Right front middle post — Take the middle post with 2 pairs of holes on one face. Lay it across the bottom shelf and front rail at the right-hand divider, holes up, threaded end at the leg end. Fix it with 2 long screws (139212) from inside. Check: The four middle posts look alike: this one has 2 pairs of hinge holes, facing up.
- Left front middle post — Lay a middle post with no holes on its upper face across the left-hand divider, threaded end at the leg end, and fix it with 2 long screws (139212) from inside.
- Turn it over — With two people, roll the frame over onto its front, so the back faces up. Check: Lift it, don't drag it over the floor.
- Back middle posts — Lay the last two middle posts across the bottom shelf and back rail at the dividers, the face with 2 holes down, threaded ends at the leg end. Fix each one with 2 long screws (139212) from inside.
- Feet in the middle posts — Screw an adjustable foot (122158) into the end of each of the 4 middle posts by hand.
- Stand it up — With two people, stand the frame up on its 8 feet. Check: Lift it up, don't drag it over the floor.
- Middle shelf — Take the smaller of the two wooden boards and lower it in from the top, between the posts, onto the tabs of the two middle rails and the end frames. Check: Use the smaller board here; the larger one is the top.
- 8 screws in the middle shelf — Fix the middle shelf with 8 short screws (152497) turned up through the tabs into the board: 3 along the back, 1 in each end frame and 3 along the front.
- Top frame on the top board — Lay the larger wooden board face down on the rug. Put the top frame on it, stubs pointing up, with its outer edges level with the edges of the board. Check: The stubs at the corners must point up, not down into the board.
- 8 screws in the top — Fix the top frame to the board with 8 short screws (152497): 3 through the tabs at each end and 2 through the middle cross bar.
- Top onto the posts — Turn the top over, lift it over the bench and lower it so the 8 stubs go into the tops of the 8 posts. Check: Two people make this easier.
- 6 screws into the stubs — Fix the stubs with 6 screws (107616): the two front corner posts from the front, the two back corner posts and the two back middle posts from inside the bench.
- Wall spacer brackets — On the back of the bench, hold a spacer bracket on each back middle post just under the top, raised middle against the post and the wings level. Fix each with 1 screw (107616) through the bracket into the post. Check: Check the direction of the brackets against the drawing: the wings stand out from the post.
- Level it — Put the bench where it will stand, against the wall. Check it with a spirit level on the bottom shelf and turn the 8 feet in or out until it stands level and steady.
- Hinges on the doors — Lay the three perforated doors face up. Screw 2 hinges (153334) to each door with 2 screws (107616) per hinge: on the left edge of the left door, on the right edge of the other two, the free leaf past the edge.
- Hang the left door — Hold the left door in its opening and screw its two free hinge leaves to the front of the left corner post with 2 screws (107616) each.
- Hang the other two doors — Hang the middle door on the right middle post and the right door on the right corner post the same way: 2 screws (107616) per hinge leaf, 8 in total. Check: If the doors do not line up, loosen the hinge screws, slide the door up or down and tighten again.
- Magnets in the doors — Open the doors. Screw a magnet (139578) to the inside of each door at the top corner of its free edge, with a screw (114755). Close the doors again.
- Square the frame — If the doors don't line up, the frame is not square. Loosen the 4 sleeve nuts at the bottom braces, push the top sideways until the frame stands square to the floor, then tighten them again. Check: The bench must stand at 90° to the floor, not lean to one side.
- Plugs in the wall — Mark the 2 holes in the back middle posts on the wall, just under the top. Pull the bench away from the wall, drill the holes and push in 2 wall plugs that suit your wall (not included). Check: The bench must be fixed to the wall to stop it tipping over. Screws and plugs are not included: ask your local store which ones suit your wall.
- Push it back — Push the bench back against the wall, so the holes in the back middle posts line up with the plugs and the spacer brackets touch the wall.
- Screw it to the wall — Open the middle door. From inside, drive 2 pan-head screws (not included) through the back middle posts into the plugs. Close the door. Check: Use pan-head screws, not countersunk ones.
- Cable clips — Open the right door. Peel the backing off the cable clips (123742) and press them on inside the bench where your cables run: on the back posts, the back rail and under the top. 10 are supplied.
- Done! — Your FJÄLLBO TV bench is assembled and fixed to the wall. Max load: 30 kg on the top and 53 kg per shelf.
FJÄLLBO TV bench: questions and answers
How long does it take to assemble the IKEA FJÄLLBO TV bench?
About 2–3 hours for 2 people, working through the 35 steps of this guide. Unpack and sort the hardware first: the In the box list has every part with its count, so you can check nothing is missing before you start.
What tools do I need for the FJÄLLBO TV bench?
Phillips screwdriver, spirit level.
Can one person assemble the FJÄLLBO TV bench?
It is planned as a 2-person build. One person can do most of it, but get help for steps 14, 17 and 22, where the furniture is lifted or turned.
Does the FJÄLLBO TV bench need to be fixed to the wall?
The manual shows a wall fixing: see step 24 (Wall spacer brackets) and step 31 (Plugs in the wall). Use screws and plugs that suit your wall (wood, brick, concrete or plasterboard), and ask at a hardware store if you are not sure. Tall furniture and drawer units that are not fixed to the wall can tip over.
What size is the FJÄLLBO TV bench once assembled?
150x36x54 cm, as given for this model. Leave extra floor space around it while you build, and room to lift or stand it up.
How many screws and fittings come with the FJÄLLBO TV bench?
104 fittings of 10 kinds, the most numerous being 42 × screw, 16 × screw, 10 × cable clip. The In the box table lists every one with its part number, so you can count them before you start.
Where can I download the IKEA FJÄLLBO TV bench assembly instructions PDF?
The official PDF is manual AA-1927215-8, free from ikea.com; this guide links it next to the steps. To find the product page with its documents, search ikea.com for article number 903.392.90 (black); other colours have their own numbers but usually the same manual.
Which IKEA manual is this guide based on?
The official manual AA-1927215-8. Manuals and fittings change over time, so compare this code with the one printed on your paper manual. If they differ, follow your paper manual.
What if a part or screw is missing?
Check every box and all the packaging first: small fittings are often taped inside. Each fitting in the In the box list has its IKEA part number (for example adjustable foot 122158). IKEA customer service can send replacement fittings using that number.
Related assembly guides
- IKEA FJÄLLBO shelving unit assembly instructions
- IKEA MARIUS stool assembly instructions
- IKEA BEKVÄM step stool assembly instructions
- IKEA LÄTT children's table with 2 chairs assembly instructions
- IKEA STIG bar stool with backrest assembly instructions
- IKEA FRANKLIN bar stool with backrest, foldable assembly instructions
- IKEA MAMMUT children's stool assembly instructions
- IKEA BRIMNES TV bench assembly instructions
All IKEA FJÄLLBO assembly guides · All chairs & stools assembly guides · All furniture assembly guides
Stuck on a step? Common assembly problems and fixes · Furniture hardware explained