IKEA BRIMNES chest of 3 drawers assembly instructions
How to assemble the IKEA BRIMNES chest of 3 drawers (dresser), step by step: 40 animated steps built from the official manual, about 2–3 hours for 2 people, with flat-blade screwdriver, Phillips screwdriver, hammer, pencil, drill (for the wall fixing).
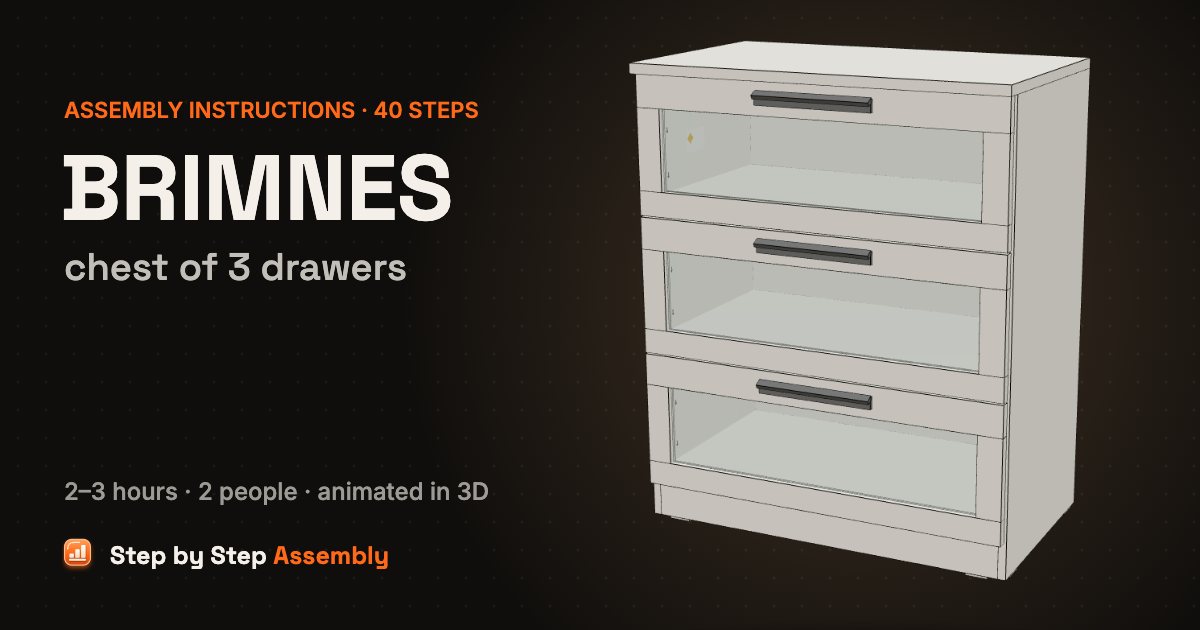
A white BRIMNES chest of 3 drawers: a cam-lock frame with three back boards and a bottom back rail built lying on its side, fixed to the wall, and three drawers with frosted-glass fronts on runners. Size: 78x46x95 cm. About 2–3 hours, 2 people. Tools: Flat-blade screwdriver, Phillips screwdriver, Hammer, Pencil, Drill (for the wall fixing).
Based on the official IKEA manual AA-2019978-10 (PDF). Guide updated .
| Steps | 40 |
|---|---|
| Time | 2–3 hours |
| People | 2 |
| Tools | Flat-blade screwdriver, Phillips screwdriver, Hammer, Pencil, Drill (for the wall fixing) |
| Size | 78x46x95 cm |
| Official manual | AA-2019978-10 |
| IKEA article number | 003.920.41 (white frosted glass) |
| Pieces in the box | 200 |
In the box
| Part | Part number | Quantity |
|---|---|---|
| Side panel | 2 | |
| Top | 1 | |
| Plinth | 1 | |
| Top front rail | 1 | |
| Bottom back rail | 1 | |
| Back board | 3 | |
| Drawer front (frosted glass) | 3 | |
| Drawer side | 6 | |
| Drawer back | 3 | |
| Drawer bottom | 3 | |
| Cam screw | 118331 | 24 |
| Cam lock 119030/118224 | 24 | |
| Wooden dowel | 101345 | 34 |
| Screw | 155669 | 10 |
| Screw | 100365 | 24 |
| Angle bracket | 10038685 | 2 |
| Glide 153548/158568 | 6 | |
| Frame runner pair | 158933 | 3 |
| Drawer runner pair | 158933 | 3 |
| Front rail | 123770 | 1 |
| Expansion screw | 110519 | 12 |
| Screw | 105344 | 6 |
| Drawer rail | 123771 | 3 |
| Handle | 124328 | 3 |
| Screw | 109567 | 6 |
| Bumpers 107091 (sheet of 2) | 3 | |
| Wall bracket | 106989 | 2 |
| Screw | 109049 | 2 |
| Washer | 100823 | 4 |
| Wall screw | 109048 | 2 |
| Wall plug | 121714 | 2 |
Steps
- Runners on the side panels — Lay both side panels on a soft surface, inside up. Fix 3 frame runners 158933 across each panel, wheel at the front edge, each with 2 screws 100365. Check: Use the small screws 100365 here, not 155669.
- Cam screws into the side panels — Screw 4 cam screws 118331 into the holes along the back edge of each side panel: one near the bottom end for the back rail and one for each back board.
- Brackets on the plinth — Lay the plinth on its front. Screw an angle bracket 10038685 onto each end of its back with 2 screws 155669.
- Plinth onto the side panel — Stand the plinth on the right side panel at the bottom front corner, bracket flat on the panel, and fix the bracket with 2 screws 155669. Check: Check the drawing: the bracket sits against the inside of the plinth, not over its end.
- Bottom back rail — Push a dowel 101345 into each end of the narrow back rail. Stand it on the right side panel at the bottom back corner, over the cam screw, with its raw edge towards the top end. Check: The drawing shows the unfinished long edge of the rail facing the top of the chest.
- Lock the back rail — Put a cam lock 119030 into the hole at the lower end of the back rail, arrow towards the edge, and turn it clockwise to lock.
- Top front rail — Push 2 dowels 101345 into each end of the top front rail. Stand it on the right side panel at the top front corner, over the holes.
- Dowels in the back boards — Lay out the 3 back boards and push 4 dowels 101345 into each: 2 into each short end.
- Back boards onto the side panel — Stand the 3 back boards on the back edge of the right side panel, between the top end and the back rail, cam lock holes facing out, and push each one down onto the dowels and cam screws.
- Lock the back boards — Put a cam lock 119030 into the hole at the lower end of each back board, arrow towards the edge, and turn it clockwise to lock.
- Left side panel on — Turn the left side panel over, inside down, and lower it onto the back boards, the back rail, the top front rail and the plinth bracket so the dowels and cam screws go into their holes.
- Lock to the left side — Put 4 cam locks 119030 into the holes at the other end of the 3 back boards and the back rail, and turn each one clockwise to lock.
- Screw the plinth to the left side — Reach in at the bottom end and fix the plinth bracket to the left side panel with 2 screws 155669.
- Wall brackets on the top — Lay the top upside down. At the back edge, screw on the 2 wall brackets 106989 with a screw 109049 and a washer 100823 each, the upright leg at the back edge.
- Cam screws into the top — Screw 4 cam screws 118331 into the holes near the side edges of the top.
- Fit the top — Push 4 dowels 101345 into the top ends of the side panels. Stand the top up, brackets inside, and push it onto the frame over the dowels and cam screws.
- Lock the top — Put 4 cam locks 119030 into the holes on the inside of the side panels, just under the top, and turn each one clockwise to lock.
- Glides, then stand it up — Press 6 glides 153548 into the bottom edges: 2 under each side panel and 2 under the plinth. Then, with a helper, stand the frame up on its glides.
- Mark the wall — Push the frame against the wall where it will stand. Reach in through the top opening and mark the wall through the slot of each wall bracket. Check: Check for hidden pipes and cables before you drill.
- Drill and plug the wall — Move the frame aside. Drill a hole at each mark and tap in the 2 wall plugs 121714 (8 mm hole for solid walls; use fixings that suit your wall). Check: The plugs and screws in the box suit most solid and hollow walls. For solid wood, use the screws without plugs (3 mm hole).
- Front rail between the drawers — Push the frame back to the wall. Screw a screw 155669 part-way into each side panel just under the middle runner, hook the slots of rail 123770 over them from below and tighten.
- Fix it to the wall — At each bracket: loosen screw 109049 a turn, drive a wall screw 109048 with a washer 100823 through the slot into the plug, then retighten 109049. Check: Always fix it to the wall: a tipping chest of drawers can kill. Never let children climb on it.
- Drawer 1: cam screws into the front — Now the drawers, starting with the top one. Lay a drawer front face down on a soft surface and screw 4 cam screws 118331 into the inside, 2 near each end.
- Drawer sides onto the front — Push 2 dowels 101345 into the front end of each drawer side and press the sides onto the front, grooves facing in. The side with the warning label goes on the left, label inside. Check: The label reminds you: fix the chest to the wall and never let children climb it.
- Lock the drawer sides — Put 4 cam locks 119030 into the holes on the inside of the drawer sides, arrow towards the front, and turn each one clockwise to lock.
- Slide in the drawer bottom — Slide the drawer bottom down the grooves in the sides, from the open end, until it reaches the front.
- Drawer back — Place the drawer back between the sides at the open end, standing on the drawer bottom.
- Fix the drawer back — Hammer 4 expansion screws 110519 through the holes in the drawer sides into the ends of the back, 2 on each side.
- Bumpers on the front — Stick 2 bumpers 107091 on the inside of the drawer front, at the lower corners just outside the drawer sides.
- Turn it over, runners on — Turn the drawer upside down on a table with the front over the edge. Lay a drawer runner 158933 on the bottom edge of each side, wheel at the back. Check: The drawer runners are marked L and R, like the frame runners.
- Screw the runners on — Fix each runner with 2 screws 100365 through its flange into the drawer side. Check: Use the small screws 100365, not 105344.
- Bottom rail: front end — Screw a screw 105344 part-way into the inside of the front, in the middle under the bottom. Hook the slotted end of rail 123771 under its head.
- Bottom rail: back end — Swing the rail down along the middle of the bottom, bent end against the drawer back, and fix it with a screw 105344.
- Handle — Turn the drawer the right way up. Hold the handle 124328 on the top band of the front and screw it on from the inside with 2 screws 109567.
- Drawer 1 into the top opening — Hold the drawer with the warning label in front of the top opening, front tipped up a little, and set its back wheels on the frame runners. Slide it in, lower the front and push it home. Check: Never open more than one drawer at a time, and keep the heaviest things in the bottom drawer.
- Drawer 2: the same again — Build drawer 2 exactly like the first one (steps 22–33): cam screws, sides, cam locks, bottom, back, expansion screws, bumpers, runners, bottom rail and handle.
- Drawer 2 in — Slide drawer 2 into the middle opening the same way: back wheels onto the runners, then level it and push it home.
- Drawer 3: the same again — Build drawer 3 exactly like the first one (steps 22–33): cam screws, sides, cam locks, bottom, back, expansion screws, bumpers, runners, bottom rail and handle.
- Drawer 3 in — Slide drawer 3 into the bottom opening the same way: back wheels onto the runners, then level it and push it home.
- Done! — Your BRIMNES chest of 3 drawers is assembled and fixed to the wall. Pull a drawer out by its handle to check it runs smoothly.
BRIMNES chest of 3 drawers: questions and answers
How long does it take to assemble the IKEA BRIMNES chest of 3 drawers?
About 2–3 hours for 2 people, working through the 40 steps of this guide. Unpack and sort the hardware first: the In the box list has every part with its count, so you can check nothing is missing before you start.
What tools do I need for the BRIMNES chest of 3 drawers?
Flat-blade screwdriver, Phillips screwdriver, hammer, pencil, drill (for the wall fixing).
Can one person assemble the BRIMNES chest of 3 drawers?
It is planned as a 2-person build. One person can do most of it, but get help for steps 11, 16 and 18, where the furniture is lifted or turned.
Does the BRIMNES chest of 3 drawers need to be fixed to the wall?
The manual shows a wall fixing: see step 14 (Wall brackets on the top) and step 19 (Mark the wall). Use screws and plugs that suit your wall (wood, brick, concrete or plasterboard), and ask at a hardware store if you are not sure. Tall furniture and drawer units that are not fixed to the wall can tip over.
What size is the BRIMNES chest of 3 drawers once assembled?
78x46x95 cm, as given for this model. Leave extra floor space around it while you build, and room to lift or stand it up.
How many screws and fittings come with the BRIMNES chest of 3 drawers?
173 fittings of 20 kinds, the most numerous being 34 × wooden dowel, 24 × cam screw, 24 × cam lock 119030/118224. The In the box table lists every one with its part number, so you can count them before you start.
Where can I download the IKEA BRIMNES chest of 3 drawers assembly instructions PDF?
The official PDF is manual AA-2019978-10, free from ikea.com; this guide links it next to the steps. To find the product page with its documents, search ikea.com for article number 003.920.41 (white frosted glass); other colours have their own numbers but usually the same manual.
Which IKEA manual is this guide based on?
The official manual AA-2019978-10. Manuals and fittings change over time, so compare this code with the one printed on your paper manual. If they differ, follow your paper manual.
What if a part or screw is missing?
Check every box and all the packaging first: small fittings are often taped inside. Each fitting in the In the box list has its IKEA part number (for example cam screw 118331). IKEA customer service can send replacement fittings using that number.
Related assembly guides
- IKEA BRIMNES wardrobe with 3 doors assembly instructions
- IKEA BRIMNES bookcase assembly instructions
- IKEA BRIMNES cabinet with doors assembly instructions
- IKEA BRIMNES bedside table assembly instructions
- IKEA BRIMNES day-bed frame with 2 drawers assembly instructions
- IKEA BRIMNES dressing table assembly instructions
- IKEA BRIMNES chest of 4 drawers assembly instructions
- IKEA BRIMNES TV bench assembly instructions
All IKEA BRIMNES assembly guides · All dressers & drawers assembly guides · All furniture assembly guides
Stuck on a step? Common assembly problems and fixes · Furniture hardware explained