IKEA BRIMNES day-bed frame with 2 drawers assembly instructions
How to assemble the IKEA BRIMNES day-bed frame with 2 drawers (daybed), step by step: 54 animated steps built from the official manual, about 3–4 hours for 2 people, with flat screwdriver, Phillips screwdriver, hammer.
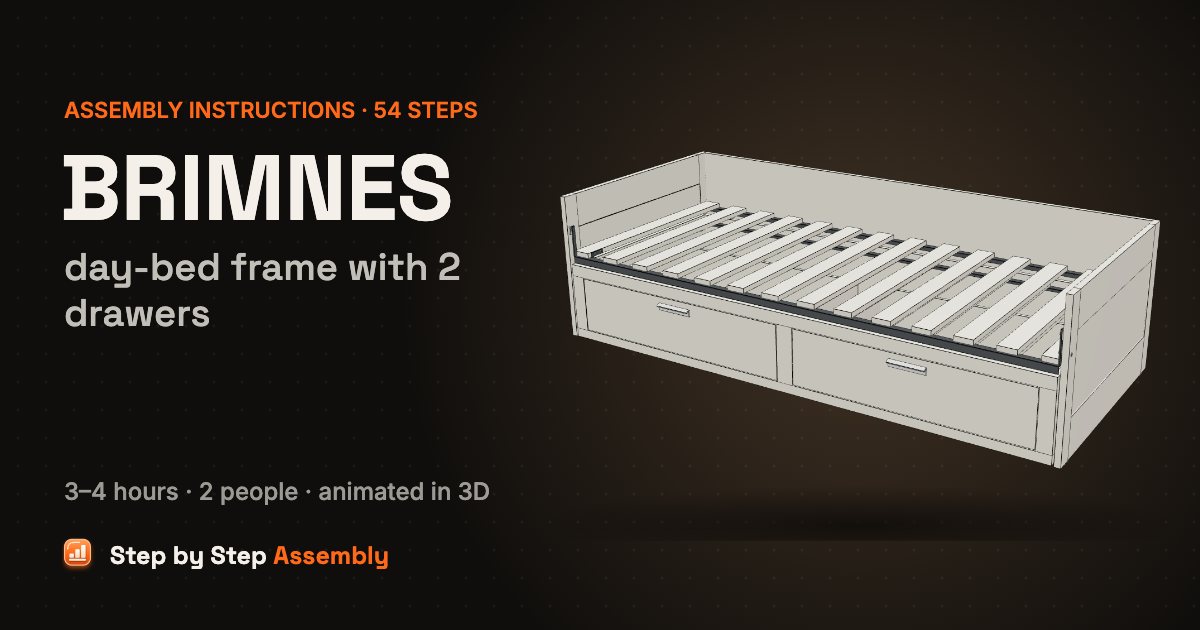
White day bed with framed end panels and a back, a slatted pull-out base on castors that turns it into a double bed, and 2 big drawers on runners in the base. Size: 80×200 cm (205×87×58 cm), pulls out to a double bed. About 3–4 hours, 2 people. Tools: Flat screwdriver, Phillips screwdriver, Hammer.
Based on the official IKEA manual AA-510318-21 (PDF). Guide updated .
| Steps | 54 |
|---|---|
| Time | 3–4 hours |
| People | 2 |
| Tools | Flat screwdriver, Phillips screwdriver, Hammer |
| Size | 80×200 cm (205×87×58 cm), pulls out to a double bed |
| Official manual | AA-510318-21 |
| IKEA article number | 002.287.05 (white) |
| Pieces in the box | 319 |
In the box
| Part | Part number | Quantity |
|---|---|---|
| Back panel (pull-out base) | 1 | |
| End panel (pull-out base) | 2 | |
| Beam (pull-out base) | 3 | |
| Face frame with 2 openings | 1 | |
| Short slat (pull-out base) | 13 | |
| Back panel (frame) | 1 | |
| End panel (frame) | 2 | |
| Long slat (frame) | 12 | |
| End slat with extra holes | 2 | |
| Steel angle | 112975 | 3 |
| Steel front rail | 112977 | 1 |
| Runner set 139505 (CR, CL, DR, DL) | 2 | |
| Drawer front | 2 | |
| Drawer back | 2 | |
| Drawer side | 4 | |
| Drawer bottom | 2 | |
| Bottom bar | 118301 | 2 |
| Handle | 124328 | 2 |
| Cam screw | 118331 | 22 |
| Cam lock | 119030 | 22 |
| Dowel | 101345 | 32 |
| Screw | 105307 | 56 |
| Pin | 110525 | 30 |
| Castor | 111401 | 6 |
| Screw | 109567 | 16 |
| Long screw | 109542 | 6 |
| Screw | 102138 | 6 |
| Spacer | 110646 | 6 |
| Screw | 100372 | 10 |
| Dowel | 101359 | 4 |
| Bolt | 114671 | 4 |
| Connector | 114670 | 4 |
| Hex key | 100049 | 1 |
| Clip | 130485 | 2 |
| Screw | 105163 | 2 |
| Sleeve | 100602 | 2 |
| Hex key | 108490 | 1 |
| Bracket | 123660 | 2 |
| Glide | 130787 | 4 |
| Screw | 100359 | 4 |
| Fixing | 110519 | 8 |
| Screw | 100365 | 12 |
Steps
- Dowels in the base end panels — Part 1 is the pull-out base, built lying on its back. Lay the long back panel and the two short end panels on a soft surface. Push 3 dowels 101345 into each short edge of both end panels (12 dowels).
- Cam screws in the back panel — Screw 7 cam screws 118331 into the inside face of the back panel: 3 at each end and 1 in the middle.
- Steel angle on the back panel — Lay a steel angle 112975 along the top edge of the back panel, ledge pointing up, and fix it at both ends with 2 screws 105307 through the slots. Check: Use the screws 105307 here, not 102138 or 100372.
- 8 more screws in the angle — Fix the rest of the steel angle with 8 screws 105307 in the slots along its length. Check: Use the screws 105307 here, not 102138 or 100372.
- Stand the end panels on — Stand the two end panels up on the ends of the back panel, the holes for the cam locks facing in, so the dowels and cam screws go into their edges.
- Lock the end panels — Push 4 cam locks 119030 into the inside of the end panels next to the back panel and turn them clockwise with a flat screwdriver to lock.
- 4 more cam locks — Push 4 more cam locks 119030 into the holes at the other end of the end panels, slot facing out. Don't turn them yet.
- Runner CR on the middle beam — Lay the 3 beams on the floor. On the middle beam, screw a cabinet runner marked CR over 3 spacers 110646 with 3 screws 102138, wheel at the front end. Check: Use the long screws 102138 with the spacers, not 100372 or 105307.
- Runner CL on the middle beam — Screw a cabinet runner marked CL onto the other side of the middle beam, again over 3 spacers 110646 with 3 screws 102138. Check: Use the long screws 102138 with the spacers, not 100372 or 105307.
- Runner CR on the right beam — Screw the second CR runner onto the inside face of the right beam (the face towards the middle beam) with 3 screws 100372, no spacers. Check: Use the short screws 100372 here, not 102138.
- Runner CL on the left beam — Screw the second CL runner onto the inside face of the left beam with 3 screws 100372, no spacers. Check: Use the short screws 100372 here, not 102138.
- Castors under the beams — Turn the beams upside down. Screw 2 castors 111401 onto each beam with 2 screws 109567 per castor (6 castors, 12 screws), then turn the beams back onto their castors.
- Dowels in the beam ends — Push 2 dowels 101345 into both ends of every beam (12 dowels).
- Stand the beams in — Stand the 3 beams up on the back panel, castors facing out of the open side, the double-runner beam in the middle and one beam against each end panel.
- Lock the beams — Push a cam lock 119030 into the hole next to the back panel on the castor side of each beam and turn it clockwise to lock (3 cam locks).
- Cam screws in the face frame — Lay the face frame (the frame with the 2 drawer openings) inside face up. Screw 7 cam screws 118331 into it, in the same places as on the back panel.
- Steel angle on the face frame — Lay the second steel angle 112975 along the top rail of the face frame, ledge pointing up, and fix both ends with 2 screws 105307. Check: Use the screws 105307 here, not 102138 or 100372.
- 8 more screws in the angle — Fix the rest of the steel angle with 8 screws 105307. Check: Use the screws 105307 here, not 102138 or 100372.
- Face frame on top — With two people, turn the face frame over and lower it onto the end panels and beams, steel angle inside and on the same side as the back panel's angle, so the cam screws go into their holes.
- Lock the end panels to the frame — Turn the 4 cam locks you pushed into the end panels in step 7 clockwise to lock the face frame.
- Lock the beams to the frame — Push a cam lock 119030 into the castor side of each beam next to the face frame and turn it clockwise to lock (3 cam locks).
- Long screws through the outer beams — Fix each outer beam to its end panel with 3 long screws 109542, screwed through the beam from the inside (6 screws).
- Screw in 4 slats — Pick the 13 shorter slats (the 14 longer ones are for the frame). Lay 4 of them across the angles at holes 2 and 12 from each end and screw each one to both angles with screws 105307 (8 screws). Check: Check the slat length first: the short slats belong in the pull-out base.
- Stand the base up, pins in 9 slats — With two people, tip the base forward onto its castors. Push 2 pins 110525 into each of the other 9 short slats (18 pins).
- Lay the slats in — Turn the 9 slats over and lay them across the base between the screwed ones, pins down into the holes in the steel angles.
- Dowels in the bed back — Part 2 is the day-bed frame. Lay the long back panel inside face up with the two framed end panels beside it. Push 2 dowels 101359 into each end of the back panel (4 dowels).
- Bolts in the end panels — Screw 2 bolts 114671 by hand into the inside face of each end panel, in the holes along the back edge (4 bolts).
- Steel angle on the bed back — Lay the third steel angle 112975 along the row of holes on the inside face of the back panel, ledge facing up, and fix both ends with 2 screws 105307. Check: Use the screws 105307 here, not 105163 or 100372.
- 8 more screws — Fix the rest of the angle with 8 screws 105307. Check: Use the screws 105307 here, not 105163 or 100372.
- Raise the back, connectors in — Swing the back panel up onto its bottom edge, angle facing the bed. Press 4 connectors 114670 into the holes in its back face, 2 at each end, arrow pointing to the panel end.
- End panels on, connectors tight — Swing each end panel up so its bolts go into the ends of the back panel. Turn the 4 connectors clockwise with the hex key 100049 until the panels are pulled tight. Check: Tighten the connectors in turn, top and bottom, until both panels sit tight.
- Steel front rail — Fit the steel front rail 112977 between the front edges of the end panels, bent-up ends at the top. Press a clip 130485 over each end and fix it with a screw 105307 into the end panel. Check: Use the screws 105307 here, not 105163 or 100372.
- Bolt the rail ends — Push a sleeve 100602 into the hole in the outside of each end panel. Screw a screw 105163 through the lower hole of the rail end into it, holding the sleeve with the hex key 108490. Check: Use the screws 105163 here, not 105307.
- Brackets on the 2 end slats — Pick the 2 long slats with extra holes in one side (the other 12 are plain). Screw a bracket 123660 onto the end of each, tab pointing down, with 2 screws 100372 (4 screws). Check: Use the screws 100372 here, not 105307.
- Turn the frame over, end slats in — With two people, lay the frame on its back. Put an end slat in at each end, bracket at the front rail and its tab inwards, and screw it to both steel angles with 2 screws 105307 (4 screws). Check: Use the screws 105307 here, not 105163 or 100372.
- Glides under the end panels — Tap a glide 130787 into each end of the bottom edge of both end panels with a hammer (4 glides).
- Pins in the 12 long slats — Push a pin 110525 into the hole at one end of each of the 12 plain long slats.
- Slats in, screwed at the front — Put the 12 slats in between the end slats, pins into the holes of the back angle. Screw the other end of each slat to the steel front rail with a screw 105307 (12 screws). Check: Never sit or stand on the slats without a mattress on them.
- Stand the frame up, roll the base in — With two people, stand the frame up. Lift it a little at the ends and push the base in under the slats, face frame out, so its back passes the tabs of the two brackets. Lower the frame again.
- Drawers: dowels in the sides — Part 3 is the 2 drawers. For each drawer lay the front inside face up and the two sides beside it. Push 2 dowels 101345 into the front end of each side (8 dowels for both drawers).
- Cam screws in the fronts — Screw 4 cam screws 118331 into the inside of each drawer front, 2 near each end (8 in total).
- Sides on the front — Stand the two sides up on the ends of the front, grooves facing in, so the dowels and cam screws go into their holes.
- Lock the sides — Push 4 cam locks 119030 into the outside of the sides next to the front and turn them clockwise to lock (8 for both drawers).
- Screw for the bottom bar — Screw a screw 100359 into the hole in the middle of each front, near the bottom edge. Leave a small gap under the head: the bar hooks under it. Check: Don't screw it in all the way.
- Bottom bar — Hook the slot of the bar 118301 under the head of the screw, the bar running along the middle of the drawer below the bottom grooves.
- Drawer bottom — Slide the drawer bottom down into the grooves in the sides, over the bar, until it reaches the front.
- Drawer back — Lay the back on the ends of the sides, over the drawer bottom.
- Fix the back — Tap 4 fixings 110519 through the back into the ends of the sides with a hammer, 2 per side (8 for both drawers).
- Screw the bar to the back — Fix the end of the bar to the back with a screw 100359.
- Drawer runners DR and DL — Stand the drawer on its bottom. Screw the drawer runner marked DR to the right side and DL to the left side along the bottom edge, 3 screws 100365 each (12 screws for both drawers). Check: Use the short screws 100365 for the runners, not 100359.
- Handles — Hold a handle 124328 on the top of each drawer front and screw it on from the inside with 2 screws 109567.
- Drawers in — Line each drawer up with its opening in the face frame, its runners on the cabinet runners, and push it in until it closes. Check: Never stand on an open drawer.
- Pull out to a double bed — To make a double bed, pull the base out by the face frame until it stops at the two bracket tabs and lay a second 80×200 mattress on it. Push it back in for a day bed.
- Done! — Your BRIMNES day bed is ready. Use two 80×200 mattresses for the double bed, and check the screws and cam locks again after a couple of weeks.
BRIMNES day-bed frame with 2 drawers: questions and answers
How long does it take to assemble the IKEA BRIMNES day-bed frame with 2 drawers?
About 3–4 hours for 2 people, working through the 54 steps of this guide. Unpack and sort the hardware first: the In the box list has every part with its count, so you can check nothing is missing before you start.
What tools do I need for the BRIMNES day-bed frame with 2 drawers?
Flat screwdriver, Phillips screwdriver, hammer.
Can one person assemble the BRIMNES day-bed frame with 2 drawers?
It is planned as a 2-person build. One person can do most of it, but get help for steps 5, 14 and 19, where the furniture is lifted or turned.
What size is the BRIMNES day-bed frame with 2 drawers once assembled?
80×200 cm (205×87×58 cm), pulls out to a double bed, as given for this model. Leave extra floor space around it while you build, and room to lift or stand it up.
How many screws and fittings come with the BRIMNES day-bed frame with 2 drawers?
270 fittings of 28 kinds, the most numerous being 56 × screw, 32 × dowel, 30 × pin. The In the box table lists every one with its part number, so you can count them before you start.
Where can I download the IKEA BRIMNES day-bed frame with 2 drawers assembly instructions PDF?
The official PDF is manual AA-510318-21, free from ikea.com; this guide links it next to the steps. To find the product page with its documents, search ikea.com for article number 002.287.05 (white); other colours have their own numbers but usually the same manual.
Which IKEA manual is this guide based on?
The official manual AA-510318-21. Manuals and fittings change over time, so compare this code with the one printed on your paper manual. If they differ, follow your paper manual.
What if a part or screw is missing?
Check every box and all the packaging first: small fittings are often taped inside. Each fitting in the In the box list has its IKEA part number (for example steel angle 112975). IKEA customer service can send replacement fittings using that number.
Related assembly guides
- IKEA BRIMNES wardrobe with 3 doors assembly instructions
- IKEA BRIMNES bookcase assembly instructions
- IKEA BRIMNES cabinet with doors assembly instructions
- IKEA BRIMNES bedside table assembly instructions
- IKEA BRIMNES dressing table assembly instructions
- IKEA BRIMNES chest of 4 drawers assembly instructions
- IKEA BRIMNES TV bench assembly instructions
- IKEA BRIMNES chest of 3 drawers assembly instructions
All IKEA BRIMNES assembly guides · All beds assembly guides · All furniture assembly guides
Stuck on a step? Common assembly problems and fixes · Furniture hardware explained