IKEA ALEX drawer unit on castors assembly instructions
How to assemble the IKEA ALEX drawer unit on castors, step by step: 20 animated steps built from the official manual, about 90–120 min for 1 person, with Phillips screwdriver, flat screwdriver, hammer, Allen key (included).
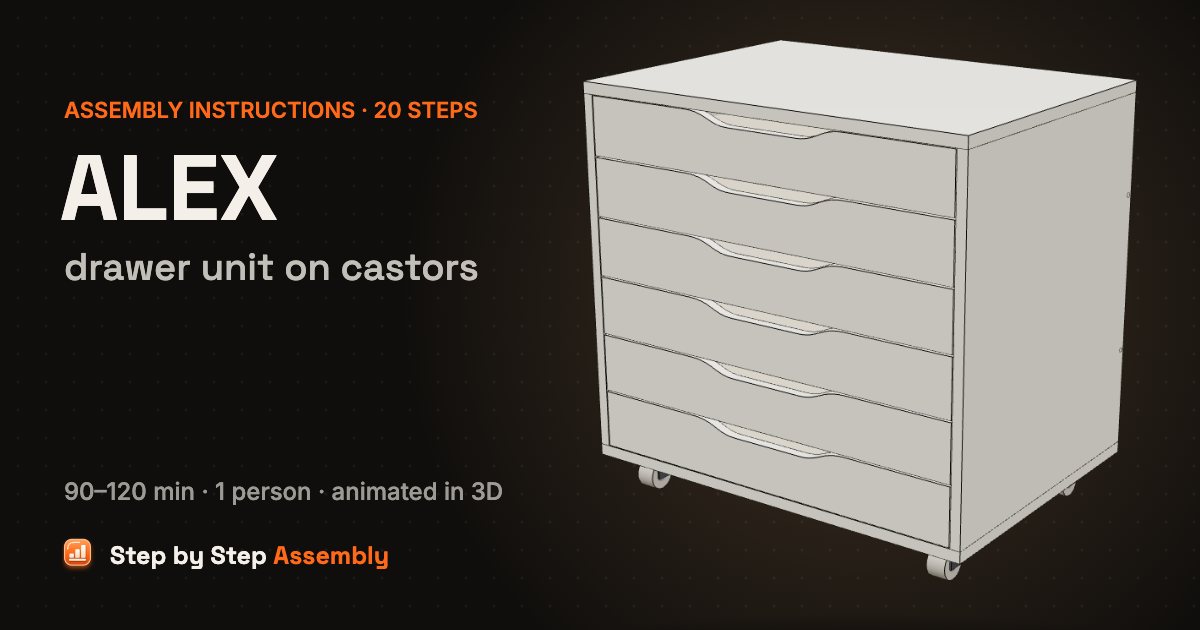
The wide, low 6-drawer ALEX unit on castors in white, made to roll under a desk: a cam-lock carcass with pre-mounted runners, six identical drawers and four castors. Size: 67×48×66 cm (26 3/8×18 7/8×26"). About 90–120 min, 1 person. Tools: Phillips screwdriver, Flat screwdriver, Hammer, Allen key (included).
Based on the official IKEA manual AA-2242534-7 (PDF). Guide updated .
| Steps | 20 |
|---|---|
| Time | 90–120 min |
| People | 1 |
| Tools | Phillips screwdriver, Flat screwdriver, Hammer, Allen key (included) |
| Size | 67×48×66 cm (26 3/8×18 7/8×26") |
| Official manual | AA-2242534-7 |
| IKEA article number | 804.854.23 (white) |
| Pieces in the box | 146 |
In the box
| Part | Part number | Quantity |
|---|---|---|
| Side panel with runners | 2 | |
| Back panel | 1 | |
| Top panel | 1 | |
| Bottom panel | 1 | |
| Drawer: front, 2 sides, bottom, back | 6 | |
| Castor | 115763 | 4 |
| Cam screw | 118331 | 18 |
| Cam screw | 100481 | 6 |
| Cam lock | 119251 | 12 |
| Cam lock | 103114 | 12 |
| Wooden dowel | 101345 | 24 |
| Screw | 100214 | 6 |
| Screw | 113213 | 16 |
| Screw | 110519 | 24 |
| Screw | 105021 | 12 |
| Allen key | 100001 | 1 |
Steps
- Cam screws into the side panels — Work on a rug or the cardboard. Lay the back panel and both side panels flat, runners facing up. Screw 3 cam screws 118331 into the small holes along the back edge of each side panel, 6 in total. Check: Screw in only the threaded part: the ribbed collar must stay above the panel.
- Dowels into the panel edges — Push 2 wooden dowels 101345 into the top edge and 2 into the bottom edge of each side panel, and 2 into each side edge of the back panel: 12 in total.
- Back panel and side panels together — Stand the back panel up on its long edge, inside face towards you. Stand each side panel up, runners facing in, and push it onto the back panel so the dowels and cam screws go into the holes in its edges.
- Lock the back panel — Put 6 cam locks 119251 into the large holes in the back panel, 3 next to each side panel, and turn each one clockwise with a flat screwdriver until it grips the cam screw. Check: Use the plain cam locks 119251 here. The ones with a cross (103114) are for the drawers.
- Cam screws into the top panel — Lay the top panel upside down in front of the frame. Screw 6 cam screws 100481 by hand into the holes along its two short edges, 3 on each side.
- Top panel onto the frame — Turn the top panel over, hold it level above the frame and lower it straight down so the cam screws and the dowels go into the holes in the top edges of the side panels.
- Lock the top panel — Fit 6 cam locks 119251 into the large holes in the side panels just under the top, 3 on each side, and turn each one clockwise with a flat screwdriver until it grips. Check: Again the plain cam locks 119251, not the ones with a cross.
- Tip it onto its back, fit the bottom — Tip the frame over onto its back. Push the bottom panel onto the open end so the dowels go into its holes, then fix it with 6 screws 100214, 3 into each side panel, using the Allen key.
- Castors — Place a castor on each corner of the bottom panel and fix each one with 4 screws 113213: 16 in total.
- Stand the unit up — Tip the unit back up so it stands on its castors, open front towards you.
- Drawers: cam screws in the fronts — The six drawers are built the same way. Lay each drawer front face down on the rug, finger grip towards you, and screw 2 cam screws 118331 into the small holes on the inside: 12 in total.
- Drawers: sides onto the fronts — Push a wooden dowel 101345 into the end of each drawer side. Stand the sides on the ends of each front, groove facing in, so the dowel and the cam screw go into the holes: 12 sides and 12 dowels.
- Drawers: lock the sides — Push a cam lock 103114 into the large hole near the front of each drawer side and turn it clockwise with a flat screwdriver until it is tight: 2 per drawer, 12 in total. Check: Use the cam locks with a cross (103114) for the drawers.
- Drawers: slide in the bottoms — Slide a drawer bottom down into the grooves of each drawer, all the way to the front. Check: The bottom must sit in the grooves of both sides and of the front.
- Drawers: drawer backs — Set a drawer back into the slots at the ends of the sides of each drawer, on top of the drawer bottom.
- Drawers: screws into the backs — Tap 2 screws 110519 through each drawer side into the end of the drawer back with a hammer: 4 per drawer, 24 in total.
- First drawer onto its runners — Pull the inner parts of the top pair of runners out towards you. Hold the drawer level in front of its opening, slide it onto the runners and fix it with 1 screw 105021 through each runner. Then push it in.
- Drawers 2 and 3 — Fit the next two drawers the same way, working downwards: runners out, drawer on, 2 screws 105021, push it in.
- The last three drawers — Fit the bottom three drawers in the same way, each with 2 screws 105021.
- Done! — Your ALEX drawer unit on castors is ready to roll under your desk. Max load: 2 kg per drawer, 18 kg in total.
ALEX drawer unit on castors: questions and answers
How long does it take to assemble the IKEA ALEX drawer unit on castors?
About 90–120 min for 1 person, working through the 20 steps of this guide. Unpack and sort the hardware first: the In the box list has every part with its count, so you can check nothing is missing before you start.
What tools do I need for the ALEX drawer unit on castors?
Phillips screwdriver, flat screwdriver, hammer, Allen key (included). Already in the box: Allen key.
Can one person assemble the ALEX drawer unit on castors?
Yes, it is a one-person build.
What size is the ALEX drawer unit on castors once assembled?
67×48×66 cm (26 3/8×18 7/8×26"), as given for this model. Leave extra floor space around it while you build.
How many screws and fittings come with the ALEX drawer unit on castors?
134 fittings of 10 kinds, the most numerous being 24 × wooden dowel, 24 × screw, 18 × cam screw. The In the box table lists every one with its part number, so you can count them before you start.
Where can I download the IKEA ALEX drawer unit on castors assembly instructions PDF?
The official PDF is manual AA-2242534-7, free from ikea.com; this guide links it next to the steps. To find the product page with its documents, search ikea.com for article number 804.854.23 (white); other colours have their own numbers but usually the same manual.
Which IKEA manual is this guide based on?
The official manual AA-2242534-7. Manuals and fittings change over time, so compare this code with the one printed on your paper manual. If they differ, follow your paper manual.
What if a part or screw is missing?
Check every box and all the packaging first: small fittings are often taped inside. Each fitting in the In the box list has its IKEA part number (for example castor 115763). IKEA customer service can send replacement fittings using that number.
Related assembly guides
- IKEA ALEX drawer unit assembly instructions
- IKEA ALEX desk assembly instructions
- IKEA ALEX drawer unit with 9 drawers assembly instructions
- IKEA HEMNES 3-drawer dresser assembly instructions
- IKEA MALM chest of 3 drawers assembly instructions
- IKEA LENNART drawer unit assembly instructions
- IKEA MALM dressing table assembly instructions
- IKEA BRIMNES bedside table assembly instructions
All IKEA ALEX assembly guides · All dressers & drawers assembly guides · All furniture assembly guides
Stuck on a step? Common assembly problems and fixes · Furniture hardware explained