IKEA HEMNES TV bench assembly instructions
How to assemble the IKEA HEMNES TV bench, step by step: 39 animated steps built from the official manual, about 2–3 hours for 2 people, with flat & Phillips screwdriver, hammer, hex key with handle (included), drill + wall plugs (wall fixing).
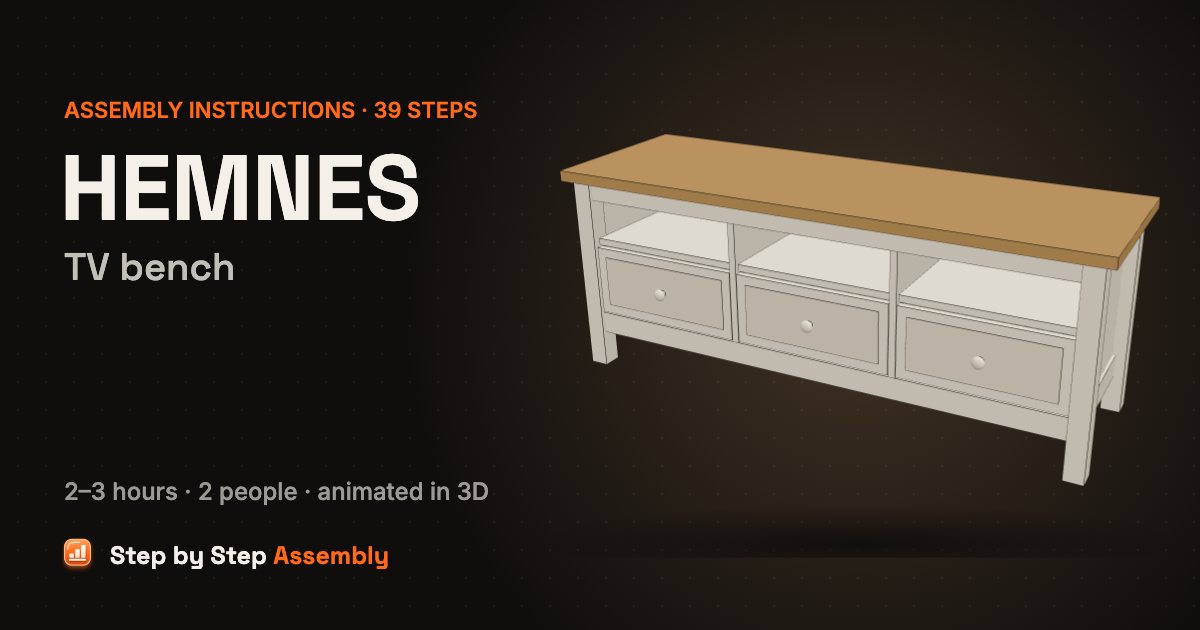
Solid pine TV bench with a light brown top: three drawers under three open shelves, built on its end from two leg frames and four long rails. Size: 148x47x57 cm. About 2–3 hours, 2 people. Tools: Flat & Phillips screwdriver, Hammer, Hex key with handle (included), Drill + wall plugs (wall fixing).
Based on the official IKEA manual AA-2730294-1 (PDF). Guide updated .
| Steps | 39 |
|---|---|
| Time | 2–3 hours |
| People | 2 |
| Tools | Flat & Phillips screwdriver, Hammer, Hex key with handle (included), Drill + wall plugs (wall fixing) |
| Size | 148x47x57 cm |
| Official manual | AA-2730294-1 |
| IKEA article number | 504.135.26 |
| Pieces in the box | 207 |
In the box
| Part | Part number | Quantity |
|---|---|---|
| Top (light brown) | 1 | |
| End frame (legs + side panel) | 2 | |
| Long rail | 4 | |
| Partition | 2 | |
| Shelf | 3 | |
| Back panel (fibreboard) | 1 | |
| Drawer front | 3 | |
| Drawer side | 6 | |
| Drawer back | 3 | |
| Drawer bottom | 3 | |
| Knock-in fixing | 110519 | 12 |
| Cam screw | 139615 | 12 |
| Dowel | 101345 | 12 |
| Screw | 100365 | 30 |
| Cam lock | 110630 | 26 |
| Knob | 117615 | 3 |
| Knob screw | 100411 | 3 |
| Screw | 100218 | 4 |
| Screw | 109570 | 4 |
| Cam screw | 118331 | 14 |
| Dowel | 101350 | 18 |
| Hex key | 100092 | 1 |
| Key handle | 121030 | 1 |
| Screw | 109560 | 10 |
| Back panel clip | 122723 | 8 |
| Shelf support | 121762 | 12 |
| Washer | 100823 | 4 |
| Wall bracket | 119256 | 2 |
| Drawer runner set 112482 (2 cabinet + 2 drawer runners) | 3 |
Steps
- Dowels into the drawer sides — You build 3 drawers with the parts from bag 1: the first one is shown in full, then the other two together. Lay each pair of drawer sides flat and push 2 dowels 101345 into the front end of each side (4 per drawer). Check: Use the short dowels 101345 here, not the thicker 101350 from bag 2.
- Cam screws into the drawer fronts — Lay each drawer front face down on a soft surface, groove up. Screw 4 cam screws 139615 into the holes near its ends with a Phillips screwdriver.
- Sides onto the fronts — Stand the two sides on each front, dowel ends down, so the dowels and cam screws go into their holes. The large cam lock holes face outwards.
- Lock the sides — Push a cam lock 110630 into each of the 4 holes on the outside of the sides and turn it clockwise with a flat screwdriver until it grips the cam screw. Check: Use a flat screwdriver that fits the slot; a Phillips one can damage it.
- Slide in the drawer bottoms — Slide each fibreboard bottom down the grooves in the sides from the open end until it sits in the groove of the front.
- Backs on top — Put each drawer back between the top ends of the sides, over the bottom.
- Knock in the back fixings — Push 4 fixings 110519 through the sides into the ends of the back (2 per side) and tap them home with a hammer.
- Knobs on the fronts — Tip each drawer upright. Hold a knob 117615 against the front and screw a screw 100411 through the front from inside into it with a Phillips screwdriver.
- Drawer runners on — Turn each drawer upside down. Lay the two drawer runners from a runner set 112482 on the bottom edges of the sides, wheel at the back and the flange against the outside.
- Screw the drawer runners — Fix each drawer runner with 2 screws 100365 into the side of the drawer (4 per drawer). Put the drawers aside.
- Cabinet runners on the end frames — Take bag 2. Lay both end frames inside up, back legs next to each other. Screw the cabinet runner marked L to the left frame and the one marked R to the right frame, wheel at the front leg, 3 screws 100365 each. Check: Check the leg ends: the back legs have the groove for the back panel.
- 8 cam screws in the legs — Screw 2 cam screws 118331 into the inside face of each leg (8 in total) with a Phillips screwdriver, only until the collar meets the wood. They hold the 4 long rails.
- First rail into the left frame — Leave the left frame lying inside up. Push a dowel 101350 into one end of the front top rail and stand the rail on the top end of the front leg, the cam hole facing into the bench. Check: Use the thick dowels 101350 for the frame.
- Lock the first rail — Push a cam lock 110630 into the hole near the bottom end of the rail and turn it clockwise with a flat screwdriver.
- The other three rails — Push a dowel 101350 into one end of each of the other 3 rails and stand them in place: front bottom on the front leg, back upper and back bottom on the back leg.
- Lock the three rails — Push in 3 cam locks 110630 and turn them clockwise with a flat screwdriver.
- Right end frame on top — Push a dowel 101350 into the top end of each rail. Lift the right end frame, turn it inside down and lower it onto the rails, front leg over the front rails.
- Lock the right end frame — Push 4 cam locks 110630 into the top ends of the rails and turn them clockwise with a flat screwdriver.
- Runners on the partitions — Lay both partitions flat. Screw a cabinet runner marked R to each with 3 screws 100365, along the bottom edge with the wheel at the front (the edge with the notch). Then turn both partitions over.
- Runners on the other faces — Screw a cabinet runner marked L to the other face of each partition with 3 screws 100365, wheel at the same edge as before.
- A dowel in each partition — Stand both partitions up, notch at the top. Push a dowel 101350 into the hole in the bottom of the notch of each one.
- Tip the frame onto its top end — With a helper, tip the frame over so it rests upside down on the top ends of the legs, front towards you.
- Swing in the partitions — Turn each partition upside down, tilt it and slide it in through the front between the rails. Swing it upright so its dowel goes into the front top rail and its bottom rests on the bottom rails.
- Screw the partitions — Slide the hex key 100092 into its handle 121030. Screw 4 screws 100218 through the bottom rails into the partitions, one at the front and one at the back of each.
- Onto its back, 8 dowels — Roll the frame onto its back. Push 8 dowels 101350 into the top end: 2 in the front top rail, 2 in each partition and 1 in each back leg.
- Cam screws in the top — Lay the top face down on a soft surface in front of the frame. Screw 6 cam screws 118331 into its underside with a Phillips screwdriver, only until the collar meets the wood.
- Wall brackets on the top — Screw a wall bracket 119256 near each back corner of the top with a washer 100823 and a screw 109560, upright leg at the back edge and set in from it, not sticking out.
- Frame onto the top — With a helper, turn the frame upside down again and lower it onto the top so the dowels and cam screws go into their holes. The brackets are at the back.
- Lock the top — Push 6 cam locks 110630 into the holes inside the frame: one in each end frame, one in each partition and two in the back of the front top rail. Turn them clockwise with a flat screwdriver.
- Screws through the front rail — Screw 4 screws 109570 through the front top rail into the top with a Phillips screwdriver. Stop when the head is flush: don't overtighten.
- Back panel — With a helper, tip the bench onto its front. Lay the fibreboard back panel on the back, between the back legs, so its edges sit in the legs' grooves.
- Clip the back panel — Fix the back panel to the back rails with 8 clips 122723 and 8 screws 109560: 4 along the upper rail and 4 along the bottom rail.
- Stand it up — With a helper, tip the bench up onto its legs and turn it round so the front faces you.
- Plugs in the wall — The bench must be fixed to the wall. Mark the 2 bracket slots on the wall, pull the bench away, drill and push in 2 plugs. Screws and plugs are not included: choose ones suited to your wall. Check: Ask your local hardware shop if you are unsure which fixings suit your wall.
- Back against the wall — Slide the bench back in front of the plugs and push it against the wall.
- Screw the brackets to the wall — Loosen each bracket screw, slide the bracket back against the wall, put a washer 100823 on a wall screw and screw it through the bracket slot into the plug. Then tighten the bracket screw again.
- Shelf supports and shelves — Push 12 shelf supports 121762 into the holes above the drawer openings, 4 per compartment, flat side up. Slide in the 3 shelves from the front and lay them on the supports.
- Drawers in — Turn each drawer upright, line its runners up with the runners in its opening and slide it in until it closes.
- Done! — Your HEMNES TV bench is finished and fixed to the wall. It holds up to 50 kg on the top; check the wall fixings now and then.
HEMNES TV bench: questions and answers
How long does it take to assemble the IKEA HEMNES TV bench?
About 2–3 hours for 2 people, working through the 39 steps of this guide. Unpack and sort the hardware first: the In the box list has every part with its count, so you can check nothing is missing before you start.
What tools do I need for the HEMNES TV bench?
Flat & Phillips screwdriver, hammer, hex key with handle (included), drill + wall plugs (wall fixing). Already in the box: Hex key with handle.
Can one person assemble the HEMNES TV bench?
It is planned as a 2-person build. One person can do most of it, but get help for steps 17, 22 and 33, where the furniture is lifted or turned.
Does the HEMNES TV bench need to be fixed to the wall?
The manual shows a wall fixing: see step 27 (Wall brackets on the top) and step 34 (Plugs in the wall). Use screws and plugs that suit your wall (wood, brick, concrete or plasterboard), and ask at a hardware store if you are not sure. Tall furniture and drawer units that are not fixed to the wall can tip over.
What size is the HEMNES TV bench once assembled?
148x47x57 cm, as given for this model. Leave extra floor space around it while you build, and room to lift or stand it up.
How many screws and fittings come with the HEMNES TV bench?
176 fittings of 18 kinds, the most numerous being 30 × screw, 26 × cam lock, 18 × dowel. The In the box table lists every one with its part number, so you can count them before you start.
Where can I download the IKEA HEMNES TV bench assembly instructions PDF?
The official PDF is manual AA-2730294-1, free from ikea.com; this guide links it next to the steps. To find the product page with its documents, search ikea.com for article number 504.135.26; other colours have their own numbers but usually the same manual.
Which IKEA manual is this guide based on?
The official manual AA-2730294-1. Manuals and fittings change over time, so compare this code with the one printed on your paper manual. If they differ, follow your paper manual.
What if a part or screw is missing?
Check every box and all the packaging first: small fittings are often taped inside. Each fitting in the In the box list has its IKEA part number (for example knock-in fixing 110519). IKEA customer service can send replacement fittings using that number.
Related assembly guides
- IKEA HEMNES 3-drawer dresser assembly instructions
- IKEA HEMNES bookcase assembly instructions
- IKEA HEMNES day-bed frame with 3 drawers assembly instructions
- IKEA HEMNES sideboard assembly instructions
- IKEA MARIUS stool assembly instructions
- IKEA BEKVÄM step stool assembly instructions
- IKEA LÄTT children's table with 2 chairs assembly instructions
- IKEA STIG bar stool with backrest assembly instructions
All IKEA HEMNES assembly guides · All chairs & stools assembly guides · All furniture assembly guides
Stuck on a step? Common assembly problems and fixes · Furniture hardware explained