IKEA VITVAL loft bed frame assembly instructions
How to assemble the IKEA VITVAL loft bed frame, step by step: 45 animated steps built from the official manual, about 3–4 h for 2 people, with Allen keys + handle (included), Phillips screwdriver, flat-blade screwdriver, hammer.
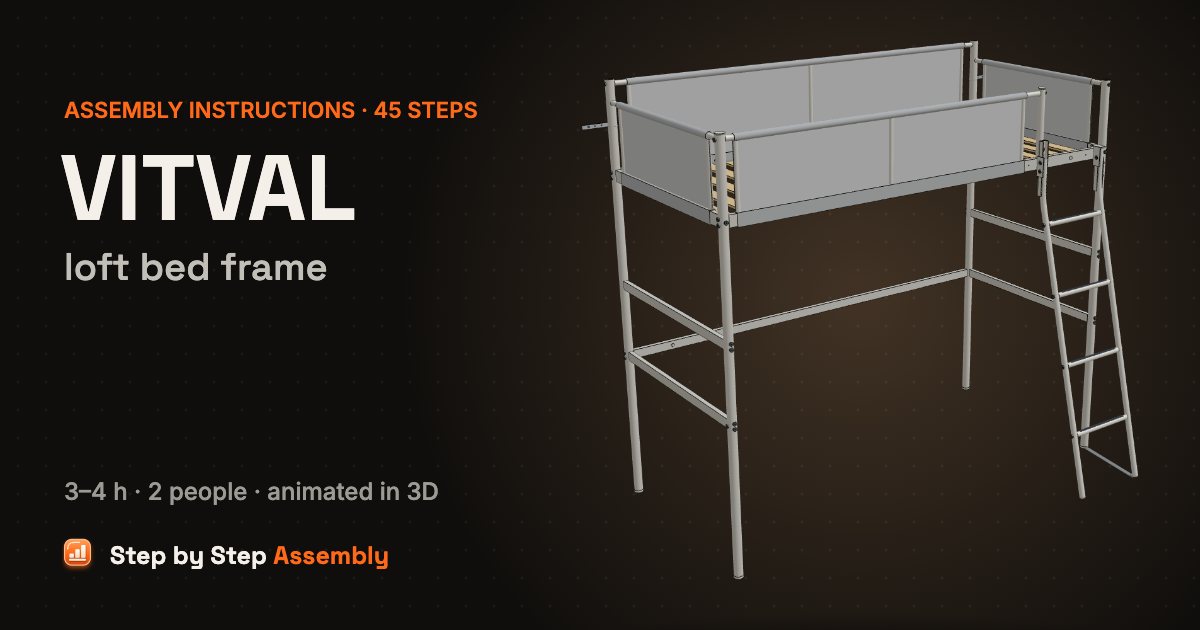
White steel loft bed with light grey fabric guards all round, a roll-out slatted base and a leaning ladder at one end of the long side. Size: 90x200 cm. About 3–4 h, 2 people. Tools: Allen keys + handle (included), Phillips screwdriver, Flat-blade screwdriver, Hammer.
Based on the official IKEA manual AA-2136291-9 (PDF). Guide updated .
| Steps | 45 |
|---|---|
| Time | 3–4 h |
| People | 2 |
| Tools | Allen keys + handle (included), Phillips screwdriver, Flat-blade screwdriver, Hammer |
| Size | 90x200 cm |
| Official manual | AA-2136291-9 |
| IKEA article number | 104.112.42 (white light grey) |
| Pieces in the box | 169 |
In the box
| Part | Part number | Quantity |
|---|---|---|
| Leg, 185 cm (front) | 2 | |
| Leg, 194 cm (back) | 2 | |
| End bar | 4 | |
| Long bottom rail (plain) | 1 | |
| Guard fabric: end | 2 | |
| Guard fabric: back (tall) | 1 | |
| Guard fabric: front | 1 | |
| End guard bottom rail | 2 | |
| Long guard rail (with holes) | 2 | |
| Upright, short | 7 | |
| Upright, long | 3 | |
| Top rod: end | 2 | |
| Top rod: back (200 cm) | 1 | |
| Top rod: front (159 cm) | 1 | |
| Slat support rail | 2 | |
| Ladder post | 1 | |
| Ladder stile | 2 | |
| Rung | 4 | |
| Ladder bracket / clip | 4 | |
| Slatted base | 1 | |
| Bolt | 10004072 | 45 |
| Screw | 10003444 | 20 |
| Screw | 120925 | 30 |
| Sleeve nut | 100602 | 8 |
| Screw | 117359 | 1 |
| Hole cap | 10004760 | 4 |
| Screw | 118832 | 1 |
| Pin | 100644 | 1 |
| Top cap | 10129455 | 1 |
| Foot plug | 121111 | 1 |
| Dome cap | 151636 | 2 |
| Strap | 121109 | 1 |
| Anti-slip strip | 121108 | 4 |
| Wall bracket | 130852 | 2 |
| Allen key | 100092 | 1 |
| Allen key | 108490 | 1 |
| Key handle | 121030 | 1 |
Steps
- End guards: bottom rails — Build both small end guards the same way. Lay a small fabric panel flat and slide a short bottom rail into the sleeve along its bottom edge. Check: Use the shorter of the bottom rails here.
- Short uprights — Push a short upright down each side sleeve until it stands on the bottom rail, then tuck the fabric edge round the rail. Do the same on the second guard. Check: Use short uprights here, not the long ones.
- Top rods — Slide a short top rod through the top sleeve of each guard so it rests on the uprights, the countersunk holes facing up. Check: Use the two shortest rods.
- Screw the end guards together — Fix each upright with a countersunk screw 10003444 down through the top rod and one up through the bottom rail, in the order 1-4, using Allen key 100092. 4 screws per guard. Check: The screw heads must sit flush in their countersinks.
- Lay out the first end — Lay one 185 cm leg (slot at the top) and one 194 cm leg on the floor with an end guard between their top ends. Put two end bars between them lower down. Check: The two legs of this end have different lengths: the long one is the back leg. Both plastic feet go at the bottom.
- Bolt the first end — Fix the end with 10 bolts 10004072 through the legs: bottom rail of the guard (both legs), the top rod at the long leg, 2 bolts per bar end at the short leg, 2 + 1 at the long leg. Tighten with Allen key 100092. Check: The top rod end at the short leg is fixed from inside the leg in the next step. Bolt heads must sit flat.
- Lock the rod inside the short leg — Drop screw 117359 into the slotted top of the short leg and screw it into the end of the guard rod with Allen key 108490 in the key handle 121030. Then knock the top cap 10129455 into the leg with a wood block and a hammer. Check: Use the flat cap 10129455 here, not the domed ones.
- Lay out the second end — Lay out the other 185 cm leg (the one without a foot) and the second 194 cm leg with the two remaining end bars between them. Check: The short leg here has an open bottom end: the strap plug goes in there.
- Bolt the second end — Fix the bars with 7 bolts 10004072: 2 at each bar end on the short leg, 2 + 1 on the long leg. Tighten with Allen key 100092.
- Knot the strap — Tie a knot near each end of the strap 121109 so the knots are 43 cm apart.
- Strap plug in the foot — Push one knotted end of the strap into the foot plug 121111 and knock the plug into the open bottom of the short leg with a wood block and a hammer. Check: Use the flat plug 121111 here, not the domed 151636.
- Back guard: bottom rail — Lay the large fabric panel flat. Slide a long rail with holes into its bottom sleeve from the left, the side with the screw holes facing the inside. Check: Check the rail is the right way round: its notch and holes must match the drawing.
- Long uprights — Push the three long uprights down the sleeves until they stand on the rail: left (1), right (2), then the middle (3). Tuck the fabric edges round the rail. Check: Use the long uprights here.
- Back top rod — Slide the longest rod through the top sleeve from the left, countersunk holes facing up.
- Screw the back guard together — Fix the uprights with 6 countersunk screws 10003444 in the order 1-6: three down through the top rod, three up through the rail. Allen key 100092.
- Slat rail on the back guard — Set a slat support rail against the inside of the bottom rail, the notches as shown, and fix it with 6 screws 120925 in the order 1-6. Use Allen key 100092 in the key handle 121030 (slot 4).
- Front guard: bottom rail — Lay the front fabric panel flat. Slide the second long rail with holes into its bottom sleeve from the left: the rail sticks out past the fabric on the right. Check: Check the rail is the right way round: its notch and holes must match the drawing.
- Short uprights — Push three short uprights down the sleeves until they stand on the rail: left (1), right (2), middle (3). Tuck the fabric edges round the rail.
- Front top rod — Slide the 159 cm rod into the top sleeve from the right, countersunk holes facing up.
- Screw the front guard together — Fix the uprights with 6 countersunk screws 10003444 in the order 1-6: three down through the rod, three up through the rail. Allen key 100092.
- Bracket on the ladder post — Lay the short ladder post down with its hole at the bottom end facing up. Put a ladder bracket over the bottom end and fix it with a screw 120925, Allen key 100092. Check: Check the bracket's shape against the drawing: the wide part goes over the post.
- Post onto the top rod — Turn the post over and slide it in from the right until it meets the end of the top rod, the bracket in front of the rail below it. Fix it with a bolt 10004072 through the post into the rod end.
- Slat rail on the front guard — Fix the second slat support rail along the inside of the front rail with 6 screws 120925 in the order 1-6, Allen key 100092 in the handle 121030.
- Stand both ends up — With a helper, stand both ends upright about 2 m apart, the long legs at the back and the short legs (with the strap) at the front.
- Low rail at the back — Put the plain long rail between the two long back legs, at the height of the lower end bars, hole facing the front. Fix each end with 2 bolts 10004072 from the outside.
- Lift in the front guard — With a helper, stand the front guard up and lift it between the two short front legs, the post towards the strap end. The rail ends meet the legs at bed height.
- Bolt the front guard — Fix the front guard with 5 bolts 10004072 from the outside of the legs: the top rod and the rail (2) at the left leg, the rail (2) at the right leg.
- Lift in the back guard — With a helper, stand the back guard up, lift it over the front guard and lower it between the two long back legs. Check: Lift it high enough to clear the front guard and the leg tops.
- Bolt the back guard — Fix the back guard with 6 bolts 10004072 from the outside of the long legs: the top rod and the rail (2) at each leg.
- Second ladder bracket — Fix the second ladder bracket to the front right leg, just below the bed rail, with 2 screws 120925 and Allen key 100092.
- Ladder: rungs between the stiles — Lay the two ladder stiles on the floor, bent ends together, and put the 4 rungs between them.
- Bolt the rungs — Fix each rung with a bolt 10004072 through each stile, 8 in total. Tighten with Allen key 100092.
- Caps on, hang the ladder — Press a domed cap 151636 onto each ladder foot, pushing the free end of the strap into the cap at the leg side. Stand the ladder up and push the top ends of the stiles into the two brackets.
- Screw the ladder to the brackets — Fix each stile top in its bracket with 2 screws 120925, Allen key 100092.
- Clips at the top of the ladder — Push the H-shaped clip onto the left stile top in front of the bed rail and fix it with 2 screws 120925. Hook the other clip over the rail at the right stile and fix it with 1 screw 120925.
- Anti-slip strips — Peel the backing off the 4 anti-slip strips 121108 and press one firmly onto the top of each rung.
- Slatted base — With a helper, lift the slatted base to bed height at the right-hand end, slats curving up, and slide it in along the slat support rails until its strap ends go into the slots at the left legs. Check: The slats must curve upwards, and the base must stay straight as it goes in.
- Lift in the second end guard — With a helper, stand the second end guard up, carry it to the right-hand end and slide it in between the two right legs.
- Bolt the second end guard — Fix the guard with 4 bolts 10004072: the top rod and the bottom rail through the front leg and through the back leg.
- Fix the slatted base — Fix the base straps to the slat support rails with 8 screws 120925 from the top (Allen key 100092) into 8 sleeve nuts 100602 from below (Allen key 108490): 4 along the front and 4 along the back.
- Close the desk hole — If you are not fitting the VITVAL desk: push the pin 100644 into the desk hole in the front left leg from the outside and screw the screw 118832 into it from the inside with a Phillips screwdriver. Check: Skip steps 34 and 35 if you are fitting the VITVAL desk: follow its own manual instead.
- Hole caps — Close the 4 remaining desk holes with the slotted caps 10004760, turning each in with a flat-blade screwdriver: 2 in the lower bar of the left end, 1 in the low back rail and 1 in the front rail by the ladder.
- Optional: wall brackets on the back legs — If the bed stands along a wall, fix it there. Put a wall bracket 130852 round each long back leg, just under the top rod, its flat end against the wall side.
- Optional: screw the brackets to the wall — Push the bed against the wall and screw each bracket to it. Use screws and plugs that suit your wall: they are not included.
- Done! — Your VITVAL loft bed is assembled. Use a 90×200 cm mattress no more than 13 cm thick so the guards stay high enough. Check the bolts again after a few weeks. Max load 100 kg.
VITVAL loft bed frame: questions and answers
How long does it take to assemble the IKEA VITVAL loft bed frame?
About 3–4 h for 2 people, working through the 45 steps of this guide. Unpack and sort the hardware first: the In the box list has every part with its count, so you can check nothing is missing before you start.
What tools do I need for the VITVAL loft bed frame?
Allen keys + handle (included), Phillips screwdriver, flat-blade screwdriver, hammer. Already in the box: Allen keys + handle.
Can one person assemble the VITVAL loft bed frame?
It is planned as a 2-person build. One person can do most of it, but get help for steps 22, 26 and 28, where the furniture is lifted or turned.
Does the VITVAL loft bed frame need to be fixed to the wall?
The manual shows a wall fixing: see step 43 (Optional: wall brackets on the back legs). Use screws and plugs that suit your wall (wood, brick, concrete or plasterboard), and ask at a hardware store if you are not sure. Tall furniture and drawer units that are not fixed to the wall can tip over.
What size is the VITVAL loft bed frame once assembled?
90x200 cm, as given for this model. Leave extra floor space around it while you build, and room to lift or stand it up.
How many screws and fittings come with the VITVAL loft bed frame?
122 fittings of 15 kinds, the most numerous being 45 × bolt, 30 × screw, 20 × screw. The In the box table lists every one with its part number, so you can count them before you start.
Where can I download the IKEA VITVAL loft bed frame assembly instructions PDF?
The official PDF is manual AA-2136291-9, free from ikea.com; this guide links it next to the steps. To find the product page with its documents, search ikea.com for article number 104.112.42 (white light grey); other colours have their own numbers but usually the same manual.
Which IKEA manual is this guide based on?
The official manual AA-2136291-9. Manuals and fittings change over time, so compare this code with the one printed on your paper manual. If they differ, follow your paper manual.
What if a part or screw is missing?
Check every box and all the packaging first: small fittings are often taped inside. Each fitting in the In the box list has its IKEA part number (for example bolt 10004072). IKEA customer service can send replacement fittings using that number.
Related assembly guides
- IKEA VITVAL bunk bed frame assembly instructions
- IKEA MALM bed frame (high, Queen) assembly instructions
- IKEA HEMNES day-bed frame with 3 drawers assembly instructions
- IKEA TUFFING bunk bed frame assembly instructions
- IKEA BRIMNES day-bed frame with 2 drawers assembly instructions
- IKEA MYDAL bunk bed frame assembly instructions
- IKEA SMÅSTAD loft bed frame w desk and storage assembly instructions
- IKEA TUFFING loft bed frame assembly instructions
All IKEA VITVAL assembly guides · All beds assembly guides · All furniture assembly guides
Stuck on a step? Common assembly problems and fixes · Furniture hardware explained