IKEA MALM bed frame (high, Queen) assembly instructions
How to assemble the IKEA MALM bed frame (high, Queen), step by step: 16 animated steps built from the official manual, about 1½–2 h for 2 people, with Phillips screwdriver, hammer, Allen key (included), wrench (included).
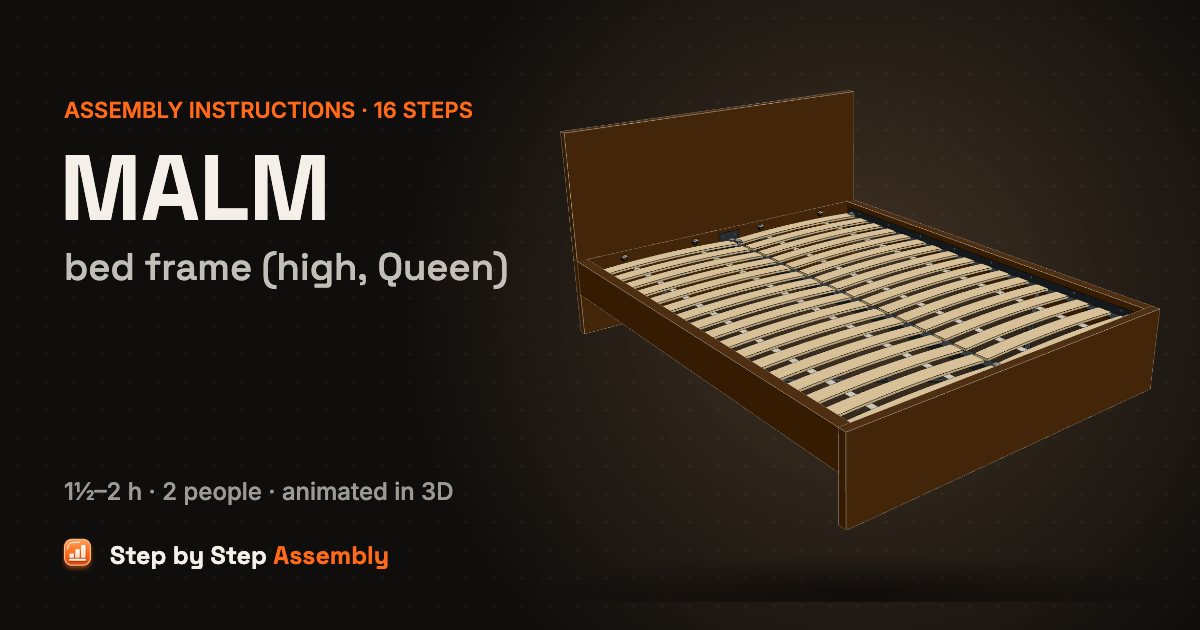
The high MALM Queen bed frame in dark-brown veneer: cam-lock frame, bolted two-part headboard, telescopic centre beam and the LURÖY roll-out slatted base. Size: 168×211 cm, headboard 100 cm (66 1/8×83 1/8", 39 3/8" high). About 1½–2 h, 2 people. Tools: Phillips screwdriver, Hammer, Allen key (included), Wrench (included).
Based on the official IKEA manual AA-2558683-1 (PDF). Guide updated .
| Steps | 16 |
|---|---|
| Time | 1½–2 h |
| People | 2 |
| Tools | Phillips screwdriver, Hammer, Allen key (included), Wrench (included) |
| Size | 168×211 cm, headboard 100 cm (66 1/8×83 1/8", 39 3/8" high) |
| Official manual | AA-2558683-1 |
| IKEA article number | 495.743.65 |
| Pieces in the box | 117 |
In the box
| Part | Part number | Quantity |
|---|---|---|
| Headboard (upper) | 1 | |
| Headboard (lower) | 1 | |
| Footboard | 1 | |
| Side rail | 2 | |
| Slat support rail 114290/114291 | 2 | |
| Telescopic brace | 117228 | 4 |
| Telescopic centre beam | 1 | |
| LURÖY slatted bed base (roll) | 2 | |
| Glide | 122628 | 6 |
| Cam bolt | 123491 | 8 |
| Dowel | 101359 | 12 |
| Cam lock | 114670 | 8 |
| Long dowel | 101367 | 5 |
| Hanger bolt | 114334 | 4 |
| Wedge | 122998 | 4 |
| Nut | 114254 | 4 |
| Screw | 110789 | 20 |
| Bracket | 116791 | 2 |
| Screw | 117327 | 12 |
| Slat clip | 10096286 | 8 |
| Screw | 105163 | 8 |
| Allen key | 100049 | 1 |
| Wrench | 113453 | 1 |
Steps
- Glides on the lower headboard and footboard — Work on a rug or the packaging. Lay the lower headboard and the footboard flat, inside face up, with their bottom edges facing each other; put the upper headboard aside. Tap 3 glides into the bottom edge of each panel with a hammer. Check: Two people are needed for this bed. Protect the floor and the panels with a soft surface.
- Cam bolts into the inside faces — Screw 2 cam bolts into the small holes at each end of the lower headboard and the footboard (8 in total), using the wrench. Screw them in all the way, but don’t drive the collar into the board.
- Stand the panels up, dowels into the rails — Stand the lower headboard and the footboard on their glides, facing each other. Place the two side rails between them and push 3 dowels (101359) into each rail end, 12 in total. Use the short dowels here, not the long ones.
- Cam locks, rails onto the headboard — The rails take 8 cam locks, 2 in the large holes on the inside of each rail end. Put in the 4 at the headboard ends first, with the arrow on each lock pointing to the end of the rail. Push the rails onto the cam bolts and dowels of the lower headboard, then turn these 4 cam locks clockwise with the Allen key until they are tight.
- Cam locks, footboard onto the rails — Put the other 4 cam locks into the foot ends of the rails, arrows pointing to the ends. Push the footboard onto the rail ends, then turn these 4 cam locks clockwise with the Allen key until they are tight.
- Long dowels into the headboard — Push the 5 long dowels (101367) into the holes in the top edge of the lower headboard.
- Hanger bolts into the upper headboard — Screw the 4 hanger bolts (114334) into the bottom edge of the upper headboard with the wrench, wood thread first. Stop when the wood thread is fully in; the machine thread must stay out.
- Mount the upper headboard — Lift the upper headboard onto the lower one so the long dowels and hanger bolts go into the holes. Through each round hole on the inside, push in a wedge (122998), then screw on a nut (114254) and tighten it with the wrench. Check: Two people: one holds the headboard while the other fits the nuts.
- Slat support rails — Screw the two metal slat support rails to the inside of the side rails with 8 screws (110789) each. Use the upper row of holes for a thin mattress and the lower row for a thick one. Check: Use the screws 110789 here, not the 105163.
- Centre brackets — Screw a centre bracket (116791) to the middle of the lower headboard and of the footboard, on the inside, with 2 screws (110789) each.
- Fit the 4 diagonal braces — Lay the 4 telescopic braces (117228) between the centre brackets and the slat support rails. Screw each end on from above with a screw (117327): 4 at the brackets and 4 at the side rails.
- Square the frame and lock the braces — Measure or check by eye that the frame is square and the side rails are straight, not bowed in or out. Then lock the length of each brace with a screw (117327) through its slot. Check: The side rails must be straight before you lock the braces.
- Centre beam — Pull the telescopic centre beam out to its full length, holding it by the middle, then lower it so its ends drop into the cradles of the two centre brackets. Check: Hold the beam at the middle while extending it, to avoid pinching your fingers.
- Slat clips (LURÖY only) — For the LURÖY slatted base, screw the 8 slat clips (10096286) on from below with the screws 105163: at each end of the bed, one on each slat support rail and two on the centre beam. A sprung slatted base doesn’t need them.
- Roll out the LURÖY slats — Unroll each LURÖY slat roll from the headboard towards the foot: one on each side of the centre beam. Slide the first and last slat of each roll under the clips.
- Done! — Your MALM bed with the LURÖY slatted base is ready. Add a Queen mattress (60×80"). Re-tighten the fittings now and then.
MALM bed frame (high, Queen): questions and answers
How long does it take to assemble the IKEA MALM bed frame (high, Queen)?
About 1½–2 h for 2 people, working through the 16 steps of this guide. Unpack and sort the hardware first: the In the box list has every part with its count, so you can check nothing is missing before you start.
What tools do I need for the MALM bed frame (high, Queen)?
Phillips screwdriver, hammer, Allen key (included), wrench (included). Already in the box: Allen key, Wrench.
Can one person assemble the MALM bed frame (high, Queen)?
It is planned as a 2-person build. One person can do most of it, but get help for steps 3 and 8, where the furniture is lifted or turned.
What size is the MALM bed frame (high, Queen) once assembled?
168×211 cm, headboard 100 cm (66 1/8×83 1/8", 39 3/8" high), as given for this model. Leave extra floor space around it while you build, and room to lift or stand it up.
How many screws and fittings come with the MALM bed frame (high, Queen)?
108 fittings of 16 kinds, the most numerous being 20 × screw, 12 × dowel, 12 × screw. The In the box table lists every one with its part number, so you can count them before you start.
Where can I download the IKEA MALM bed frame (high, Queen) assembly instructions PDF?
The official PDF is manual AA-2558683-1, free from ikea.com; this guide links it next to the steps. To find the product page with its documents, search ikea.com for article number 495.743.65; other colours have their own numbers but usually the same manual.
Which IKEA manual is this guide based on?
The official manual AA-2558683-1. Manuals and fittings change over time, so compare this code with the one printed on your paper manual. If they differ, follow your paper manual.
What if a part or screw is missing?
Check every box and all the packaging first: small fittings are often taped inside. Each fitting in the In the box list has its IKEA part number (for example slat support rail 114290). IKEA customer service can send replacement fittings using that number.
Related assembly guides
- IKEA MALM chest of 3 drawers assembly instructions
- IKEA MALM dressing table assembly instructions
- IKEA MALM chest of 2 drawers assembly instructions
- IKEA HEMNES day-bed frame with 3 drawers assembly instructions
- IKEA TUFFING bunk bed frame assembly instructions
- IKEA BRIMNES day-bed frame with 2 drawers assembly instructions
- IKEA MYDAL bunk bed frame assembly instructions
- IKEA SMÅSTAD loft bed frame w desk and storage assembly instructions
All IKEA MALM assembly guides · All beds assembly guides · All furniture assembly guides
Stuck on a step? Common assembly problems and fixes · Furniture hardware explained